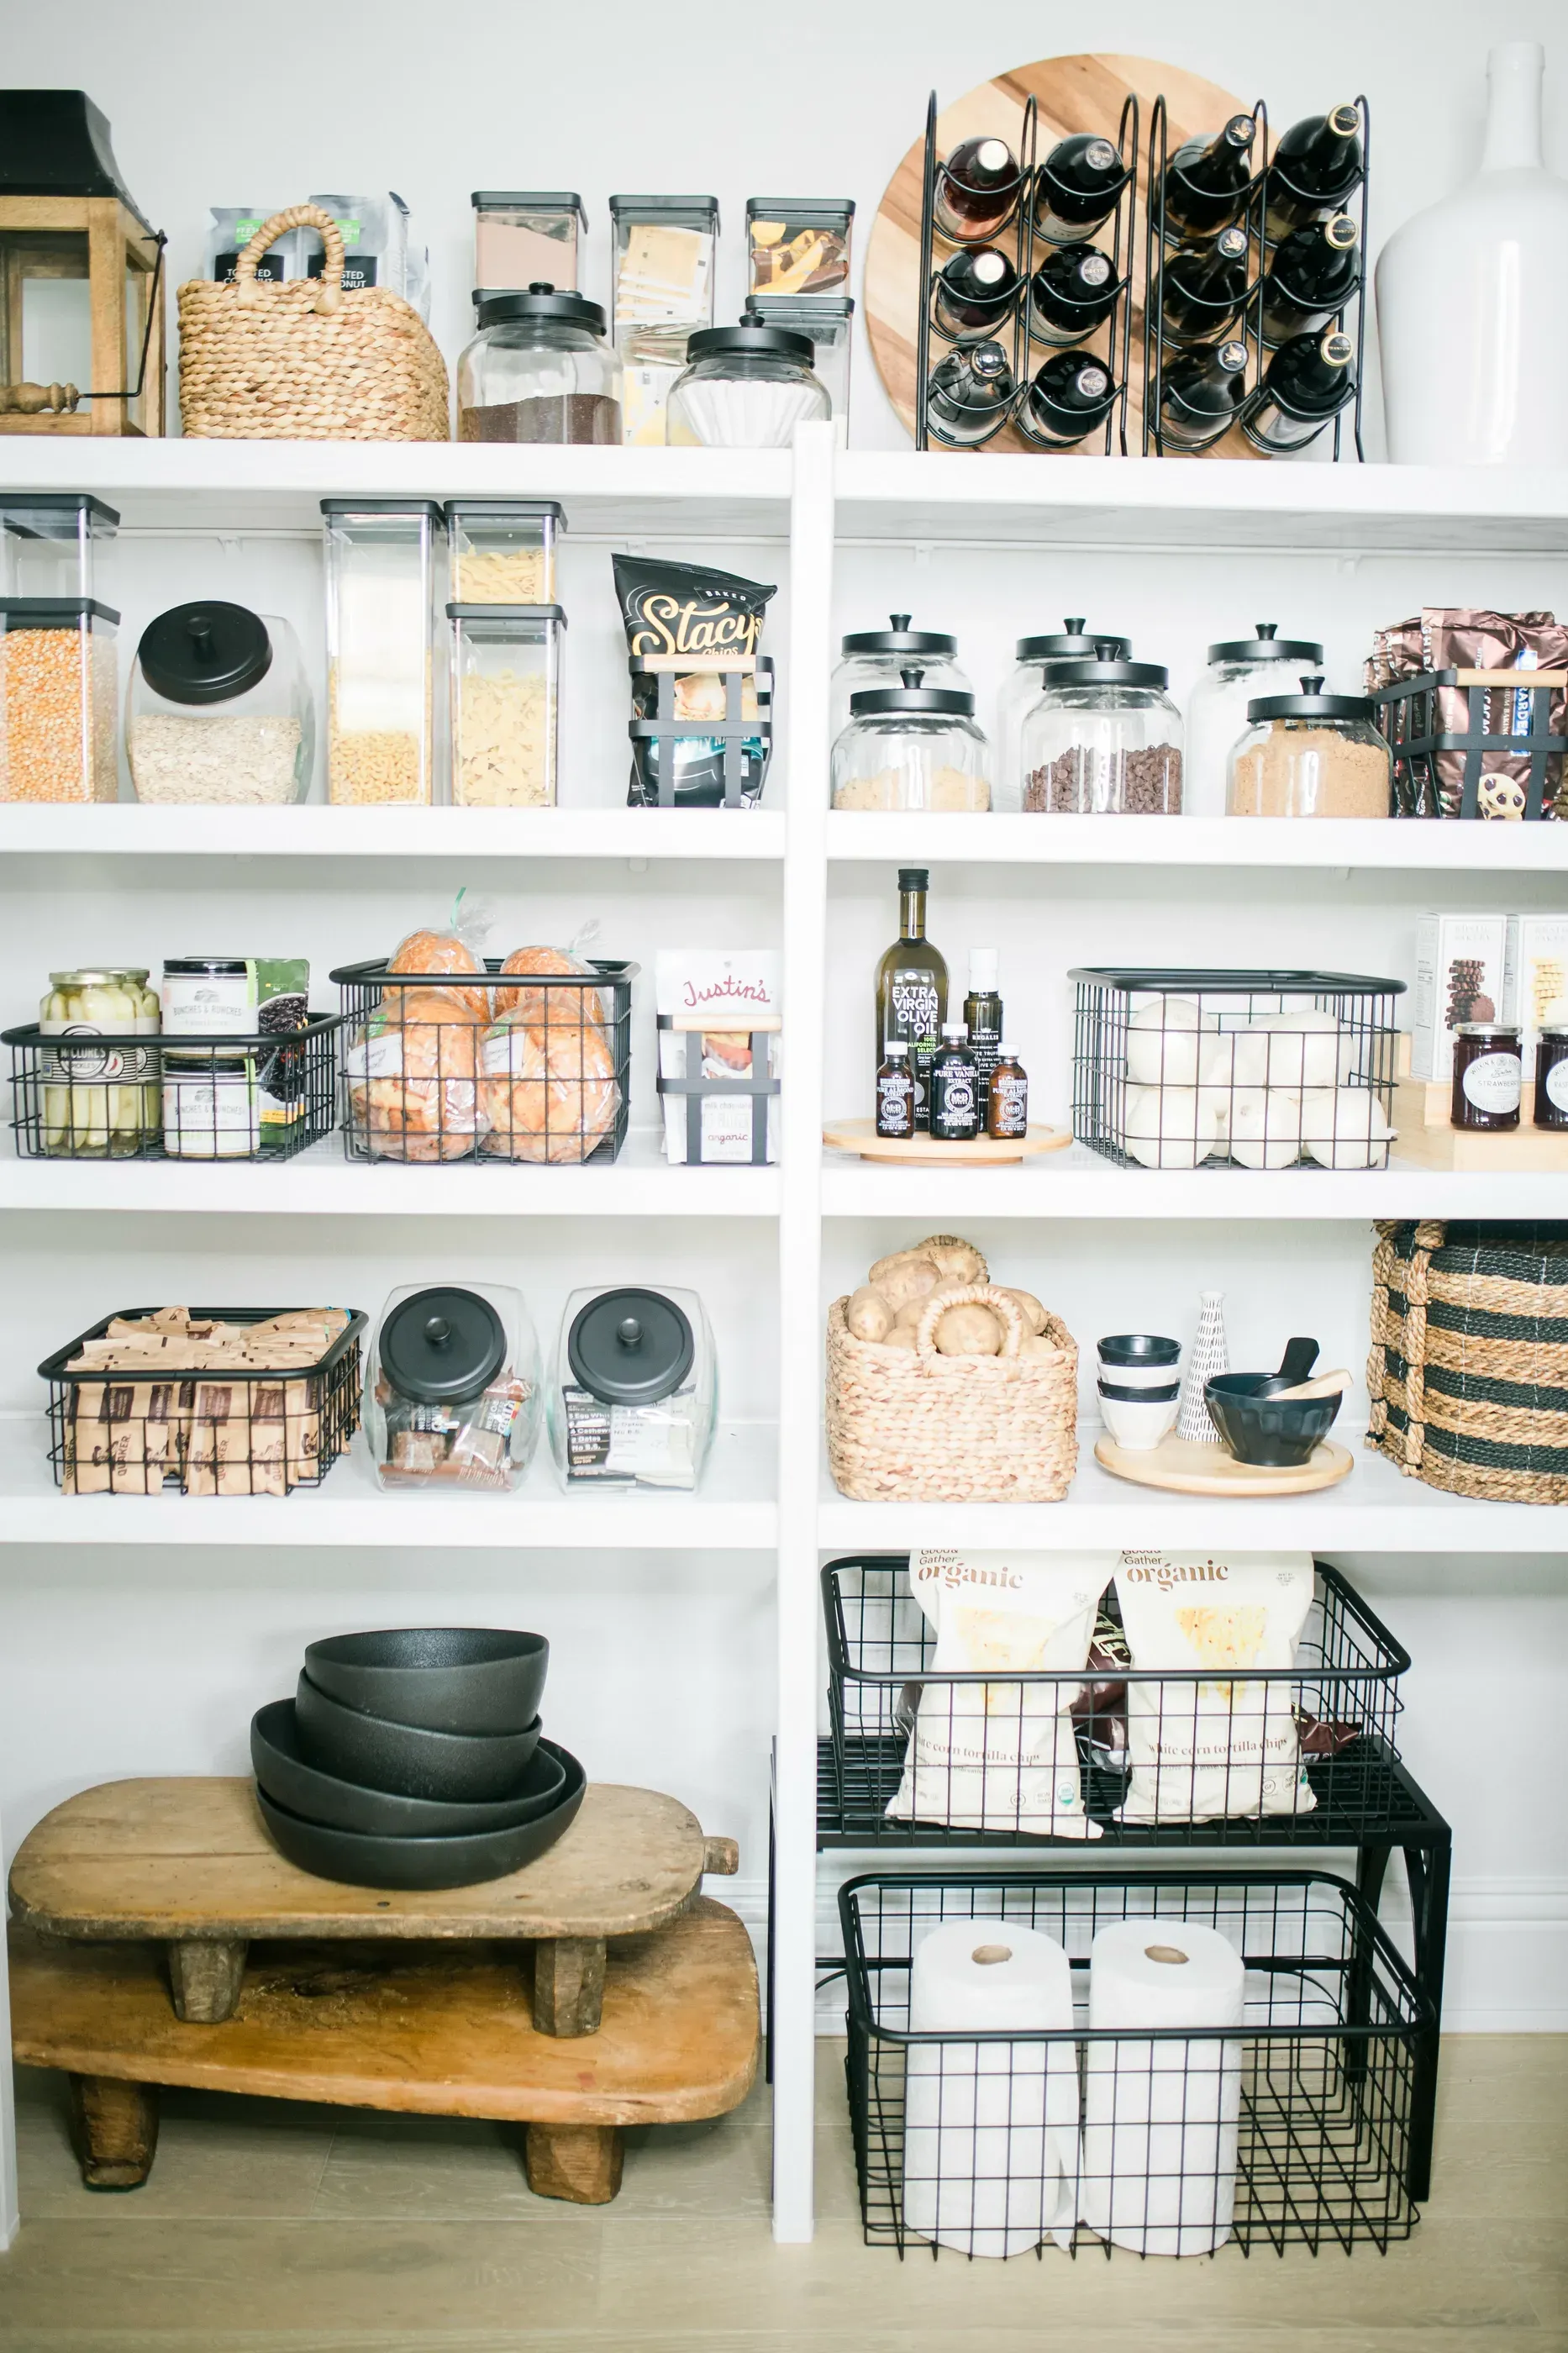
Tradition has many of us organizing our pantries by food type. Today, professional designers and organizers use zones, not food groups. Your most-used items sit at eye-level, and the rest is organized according to your habits and unique space.
That’s only one of the walk-in kitchen pantry ideas we’re sharing today. If you’ve just completed a kitchen remodel or are about to begin one, keep reading. We’re eliminating waste, stress, and blind spots with tips on how to organize a walk-in pantry.
Key takeaways:
-
Organize the contents of your pantry by zone, not food group.
-
Design principles, such as the right shelf height and depth, help keep the space organized more than store-bought containers.
-
Bundling a kitchen and pantry remodel gives you the chance to customize storage and optimize lighting for both.
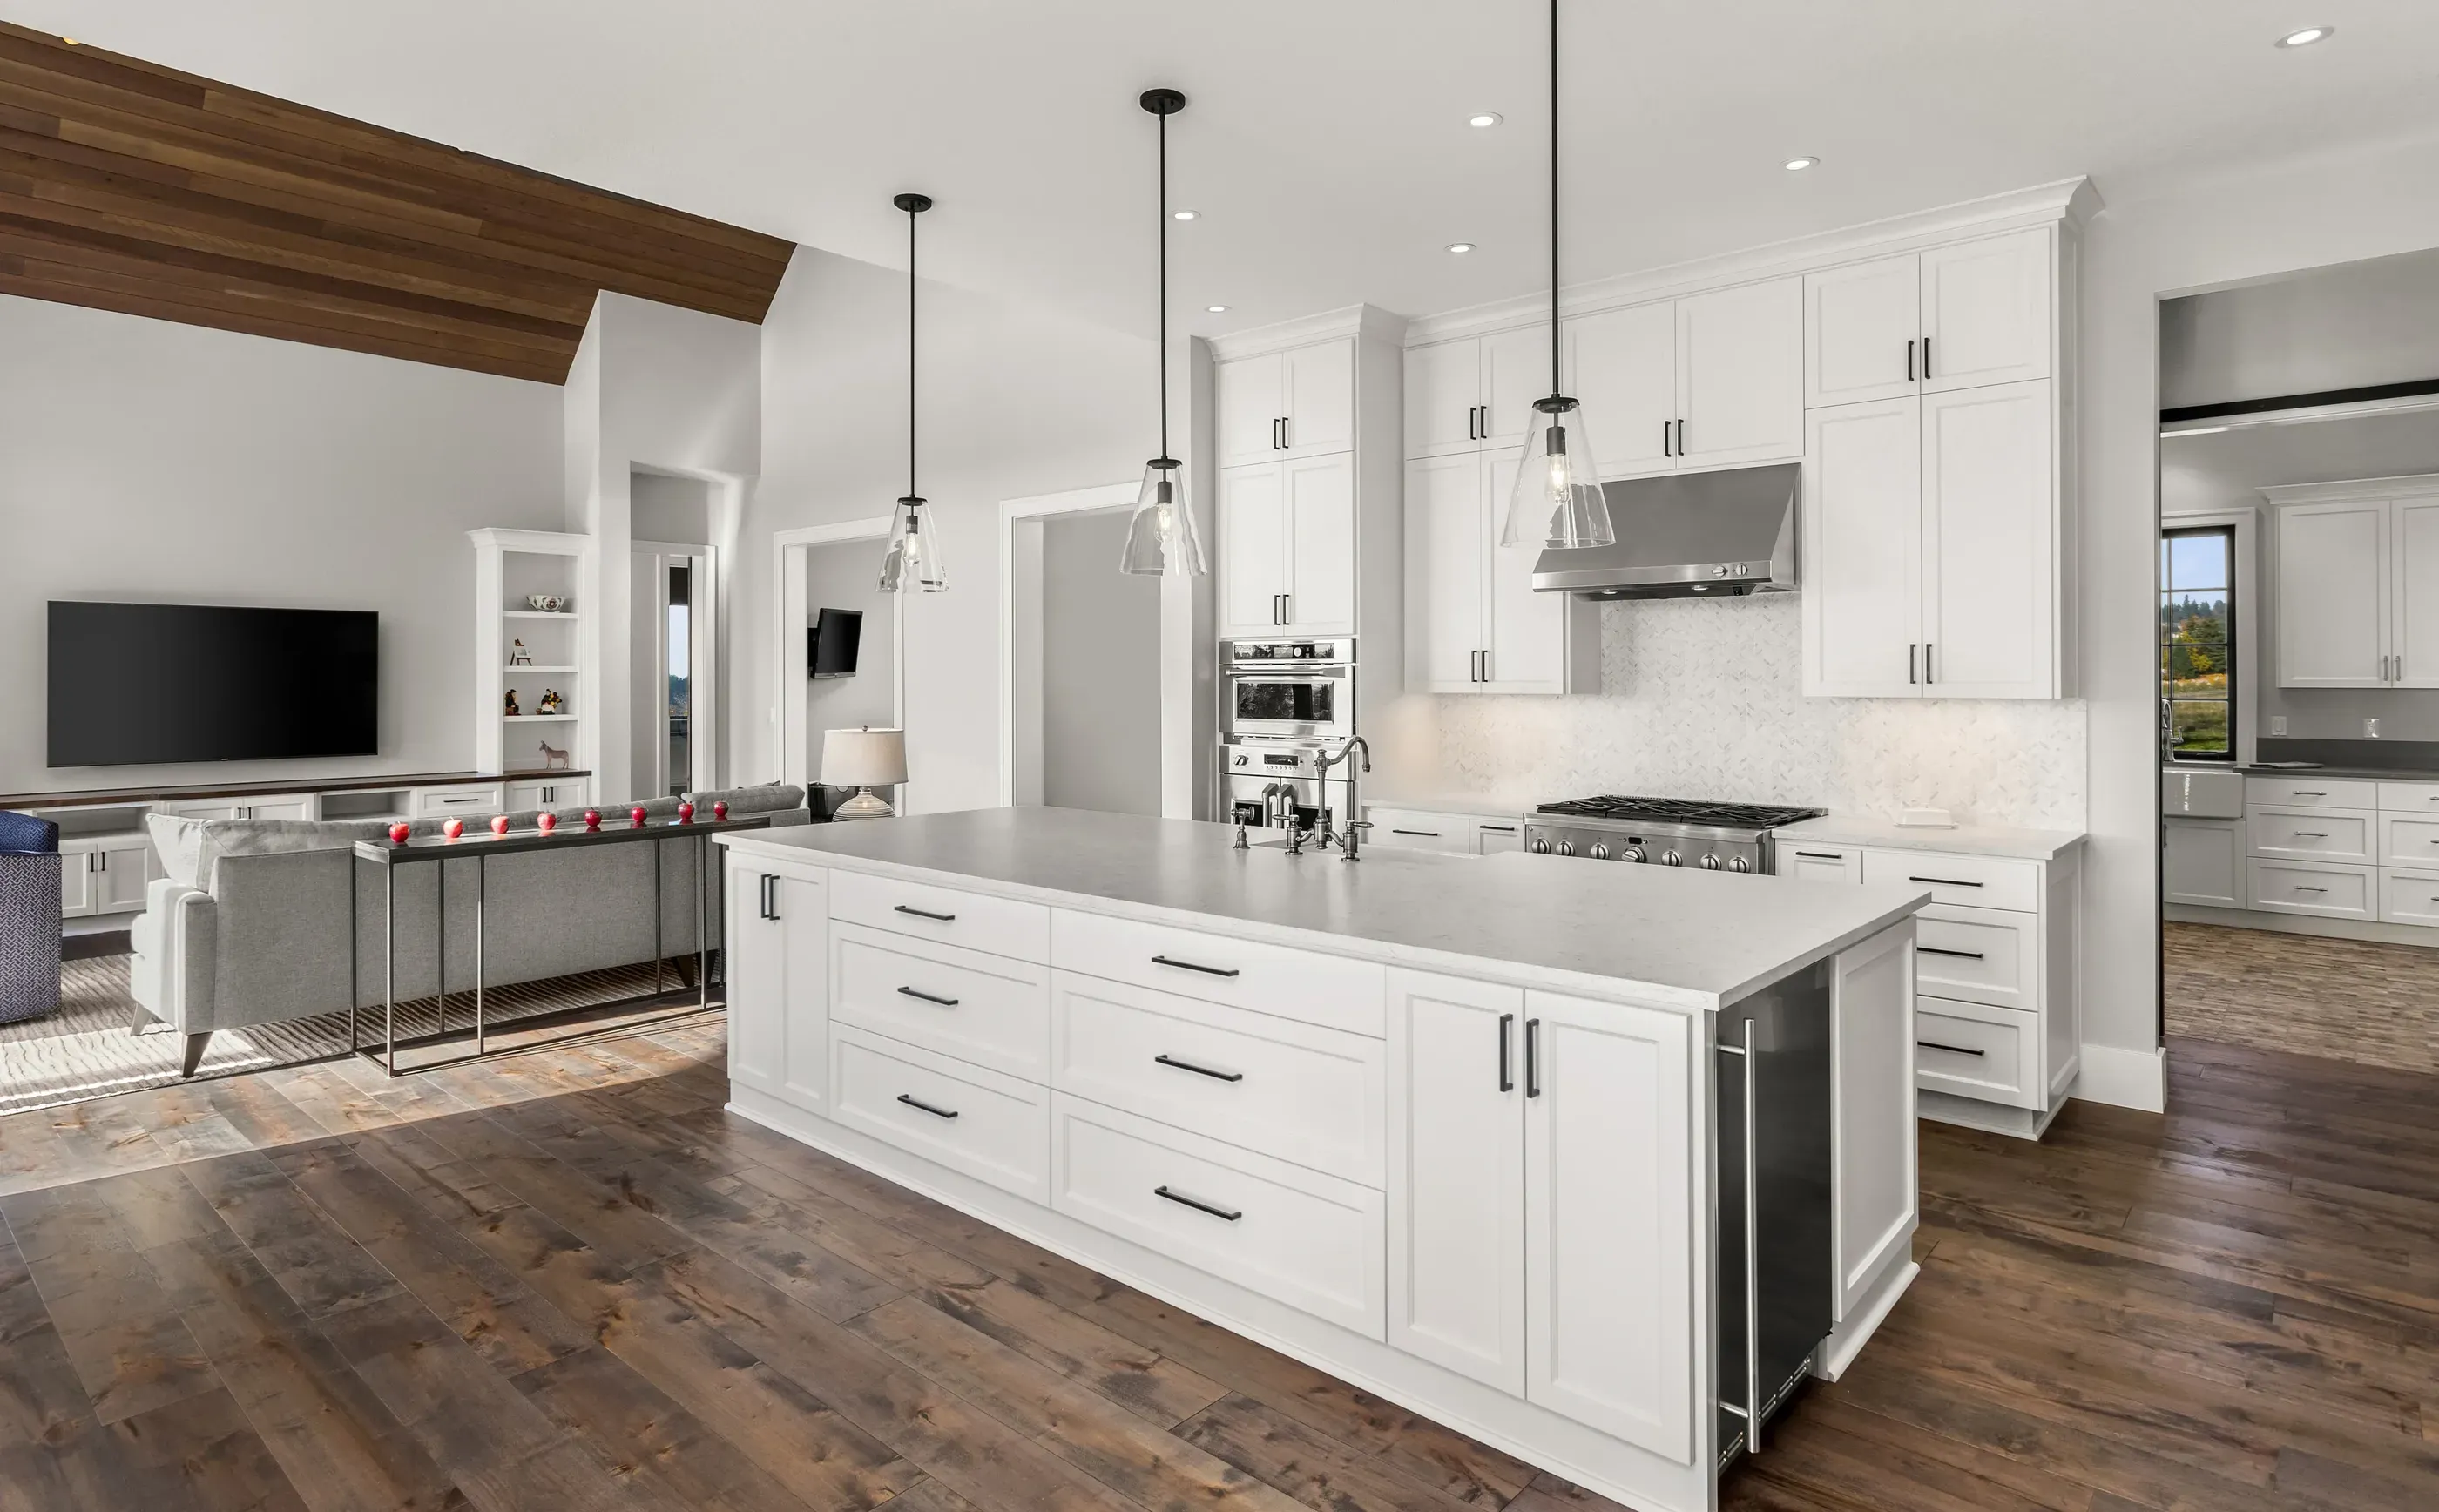
Walk-in kitchen pantry ideas: The 4 zones that create easy access
The National Kitchen and Bath Association has updated guidelines for kitchen planning and design. They recommend designers help homeowners arrange the contents of the pantry by zone, not product type.
This aligns with other design developments, such as the rise of smart kitchen work zones.
1. Front and center: The daily grab zone.
There are only a few firm rules for populating your own pantry zones, and this is one of them. Your sweet spot, the zone where your daily-use items live, is 36” to 60” inches from the floor. For the average adult, this puts all of the most-used ingredients at eye level.
2. Above: Seasonal and less-used.
Holiday platters, rarer ingredients, perhaps a little bit of backstock. If it's an item that you don’t use once or twice a month, it goes on the upper reaches. This way, you’re not on a step stool every day.
The second must-follow rule applies to this pantry zone. Heavier items like appliances and bulk bags of potatoes are not stored overhead.
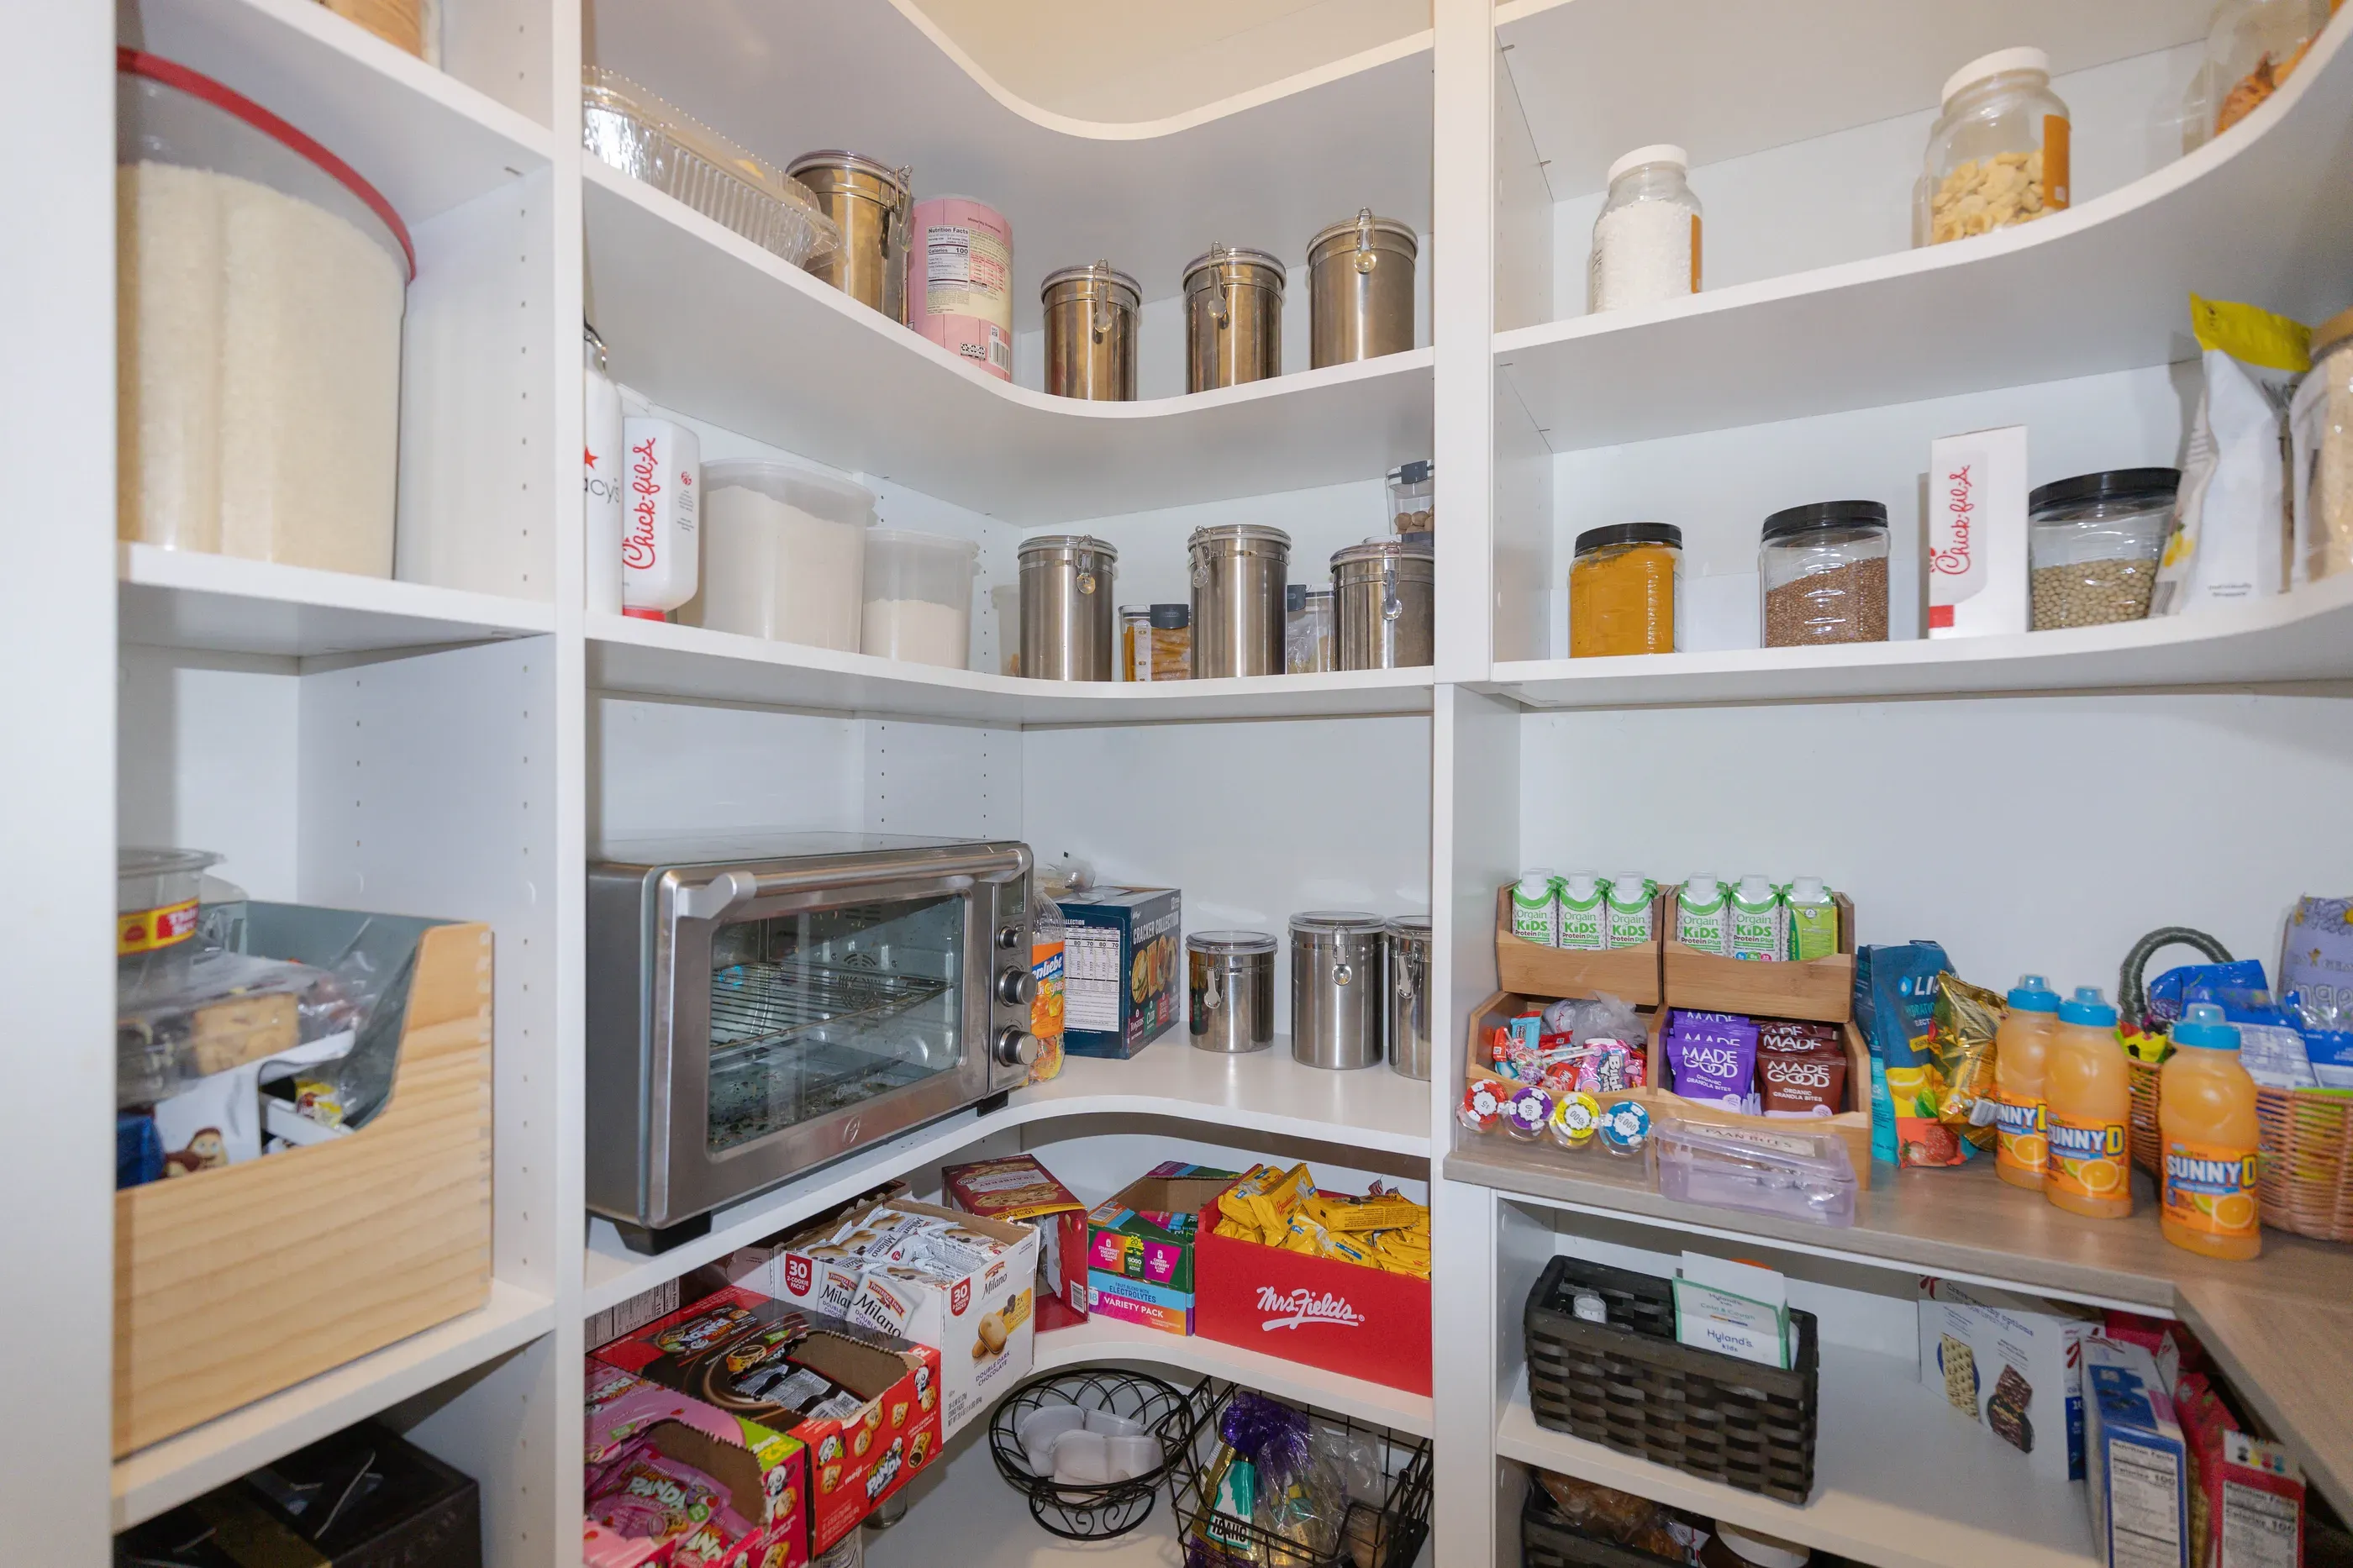
3. Below: Bulk storage and the kids’ zone.
Household goods and most of your bulk storage go directly below your eye-level zone, from 8-36” from the floor. If you have kids who can help themselves, keep those items in this zone. This way, they don’t mess up your most important shelf or embark on a dangerous climb for something they want.
4. Entrance/lower sides: The buffer zone.
L or U-shaped pantry layouts offer special opportunities for the stuff that creates confusion. The Costco haul you haven’t unpacked, the baking supplies, the old coffee maker you plan on giving away. This is also a good spot for extra storage containers and grocery bags.
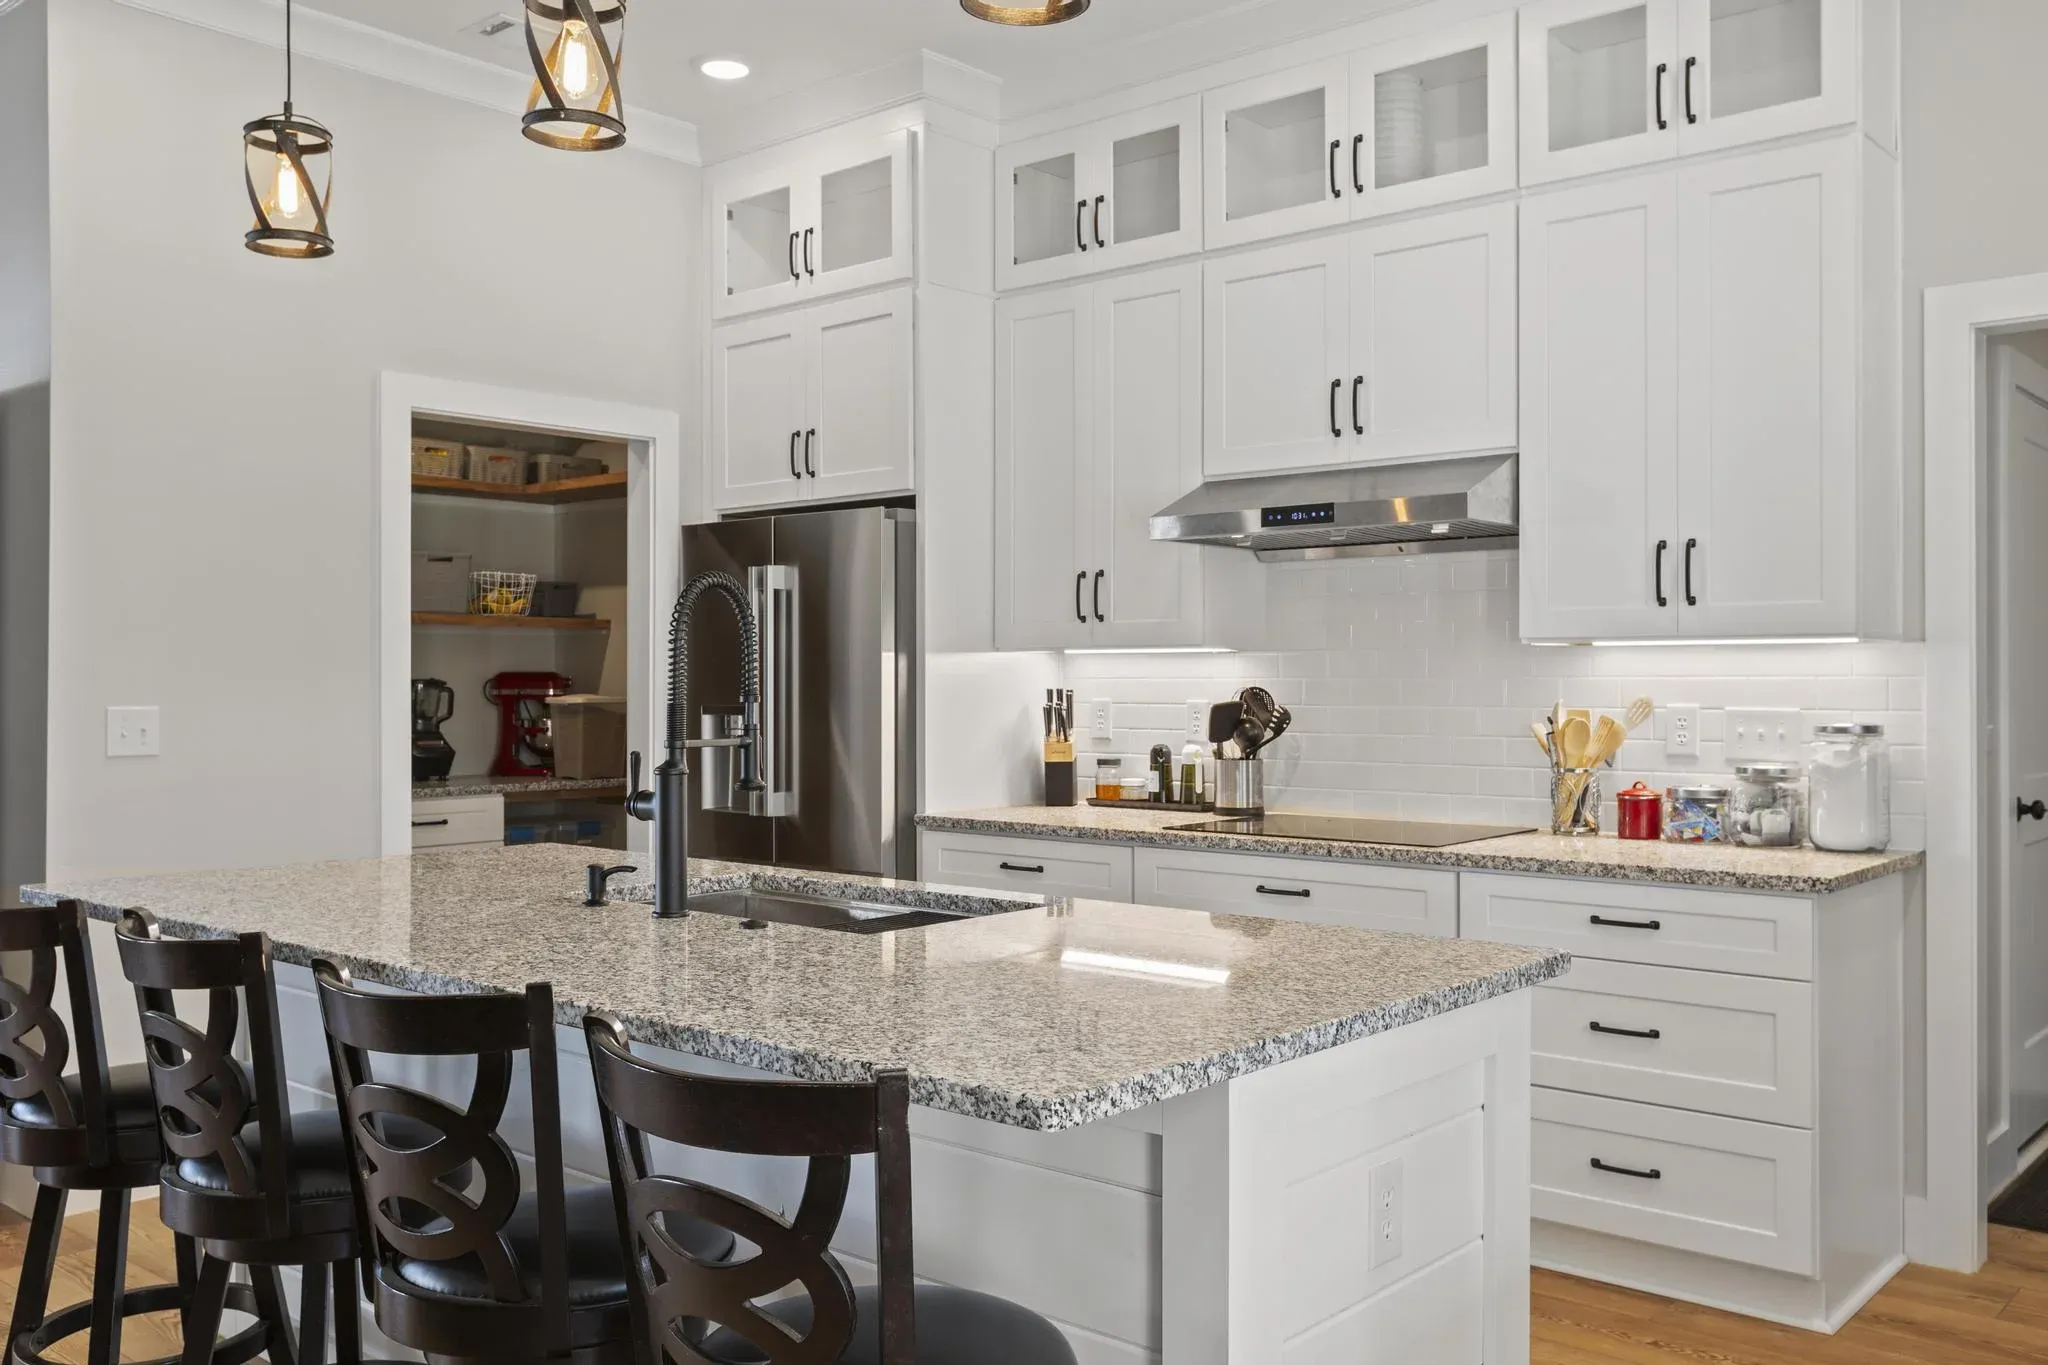
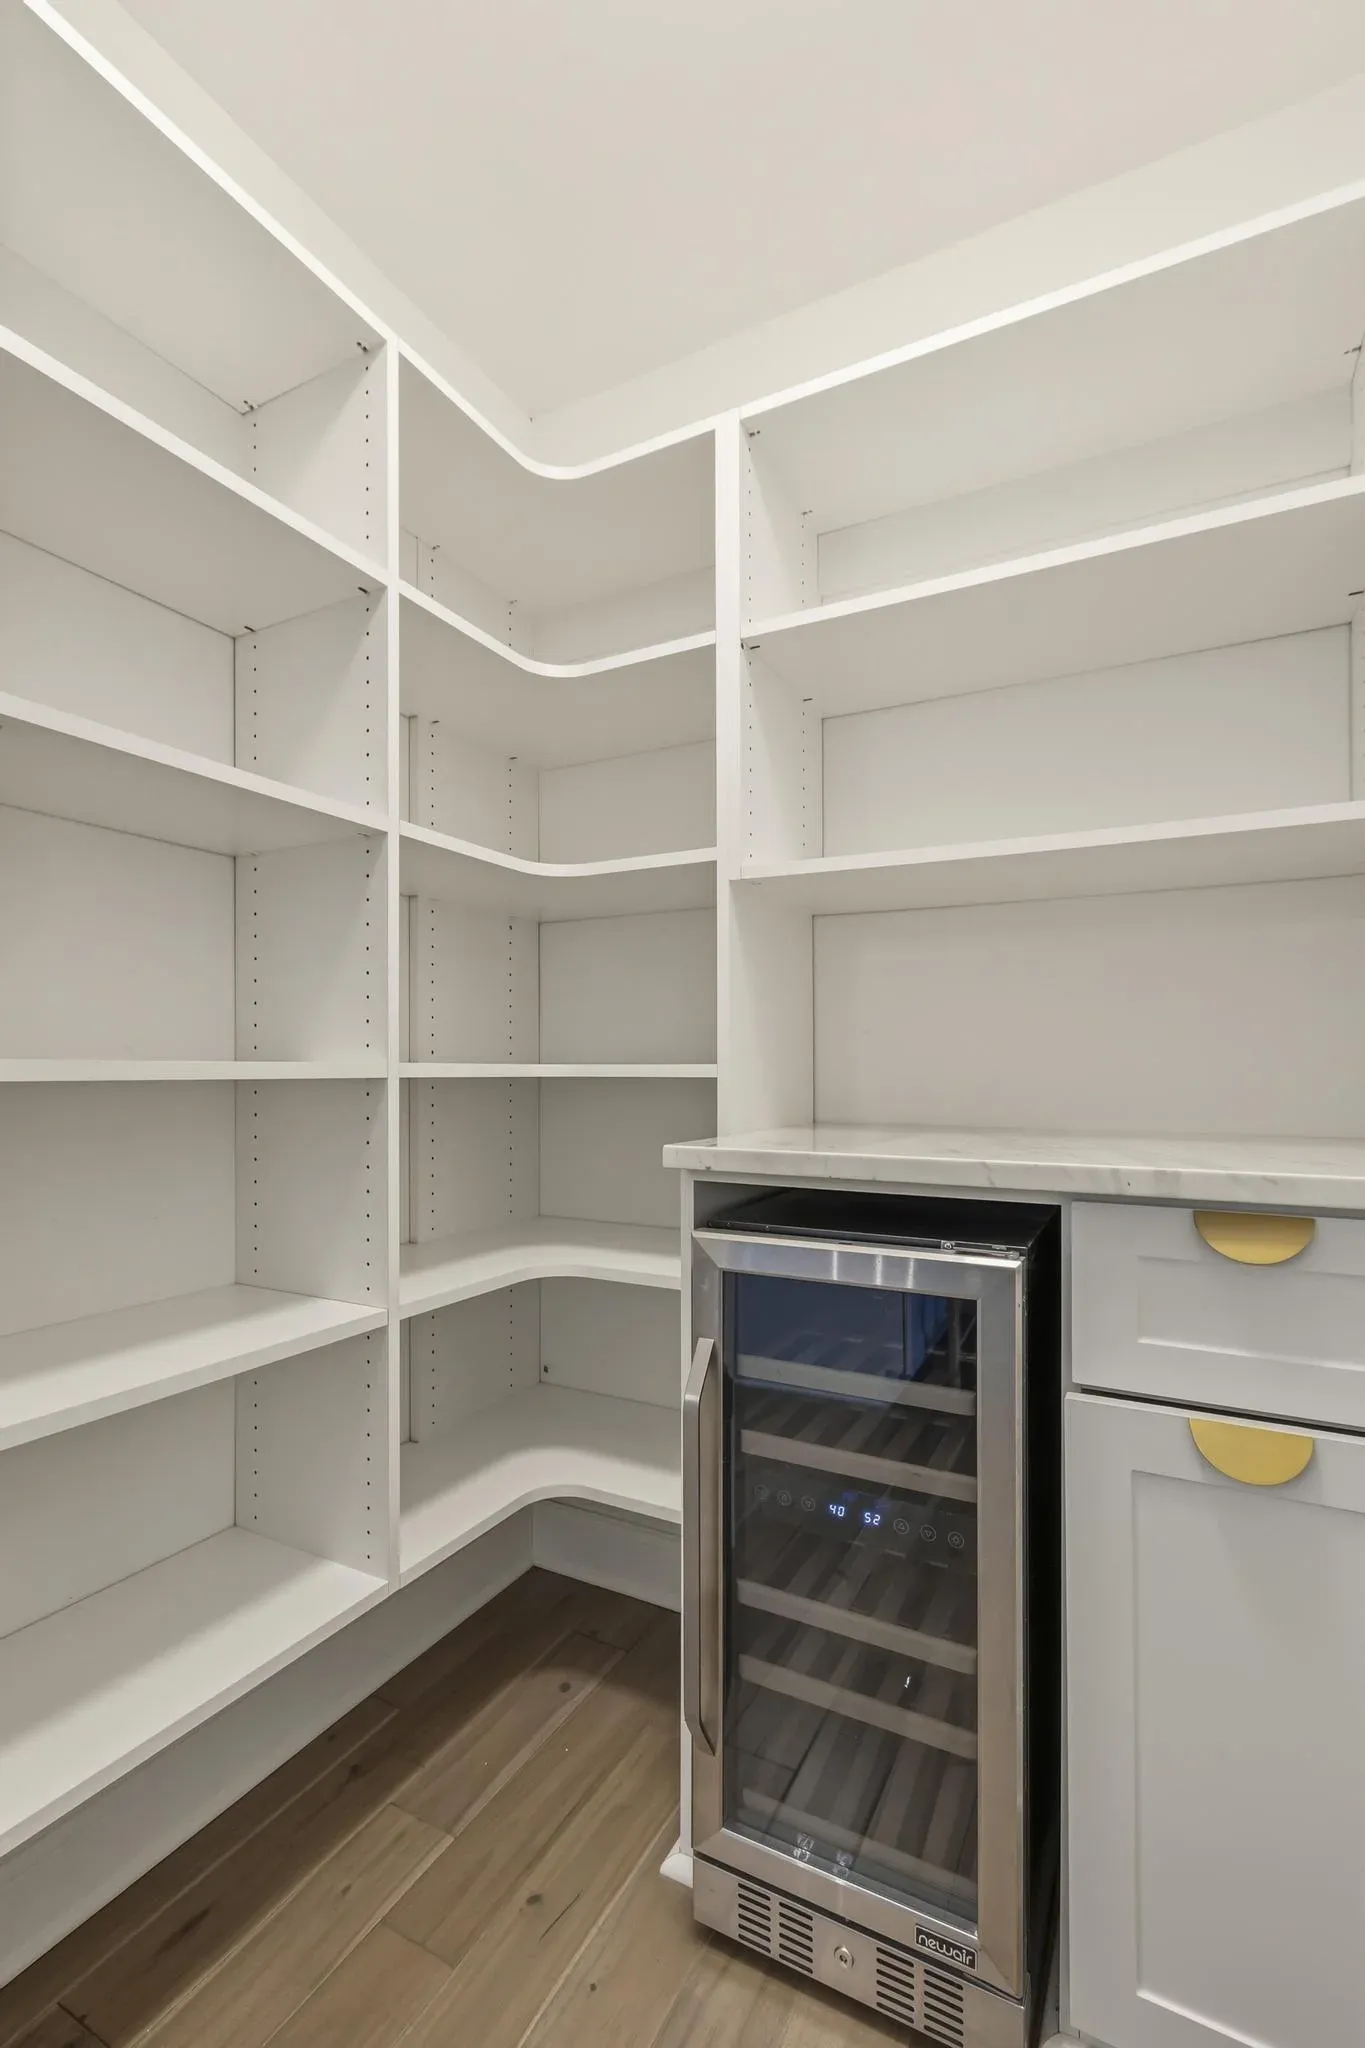
Designer-approved pantry organization ideas that reduce waste
Light overhead, heavy below, the sweet spot at eye level, and a buffer zone. That’s how to organize the contents of a pantry. Here’s the foundation: a design that supports it.
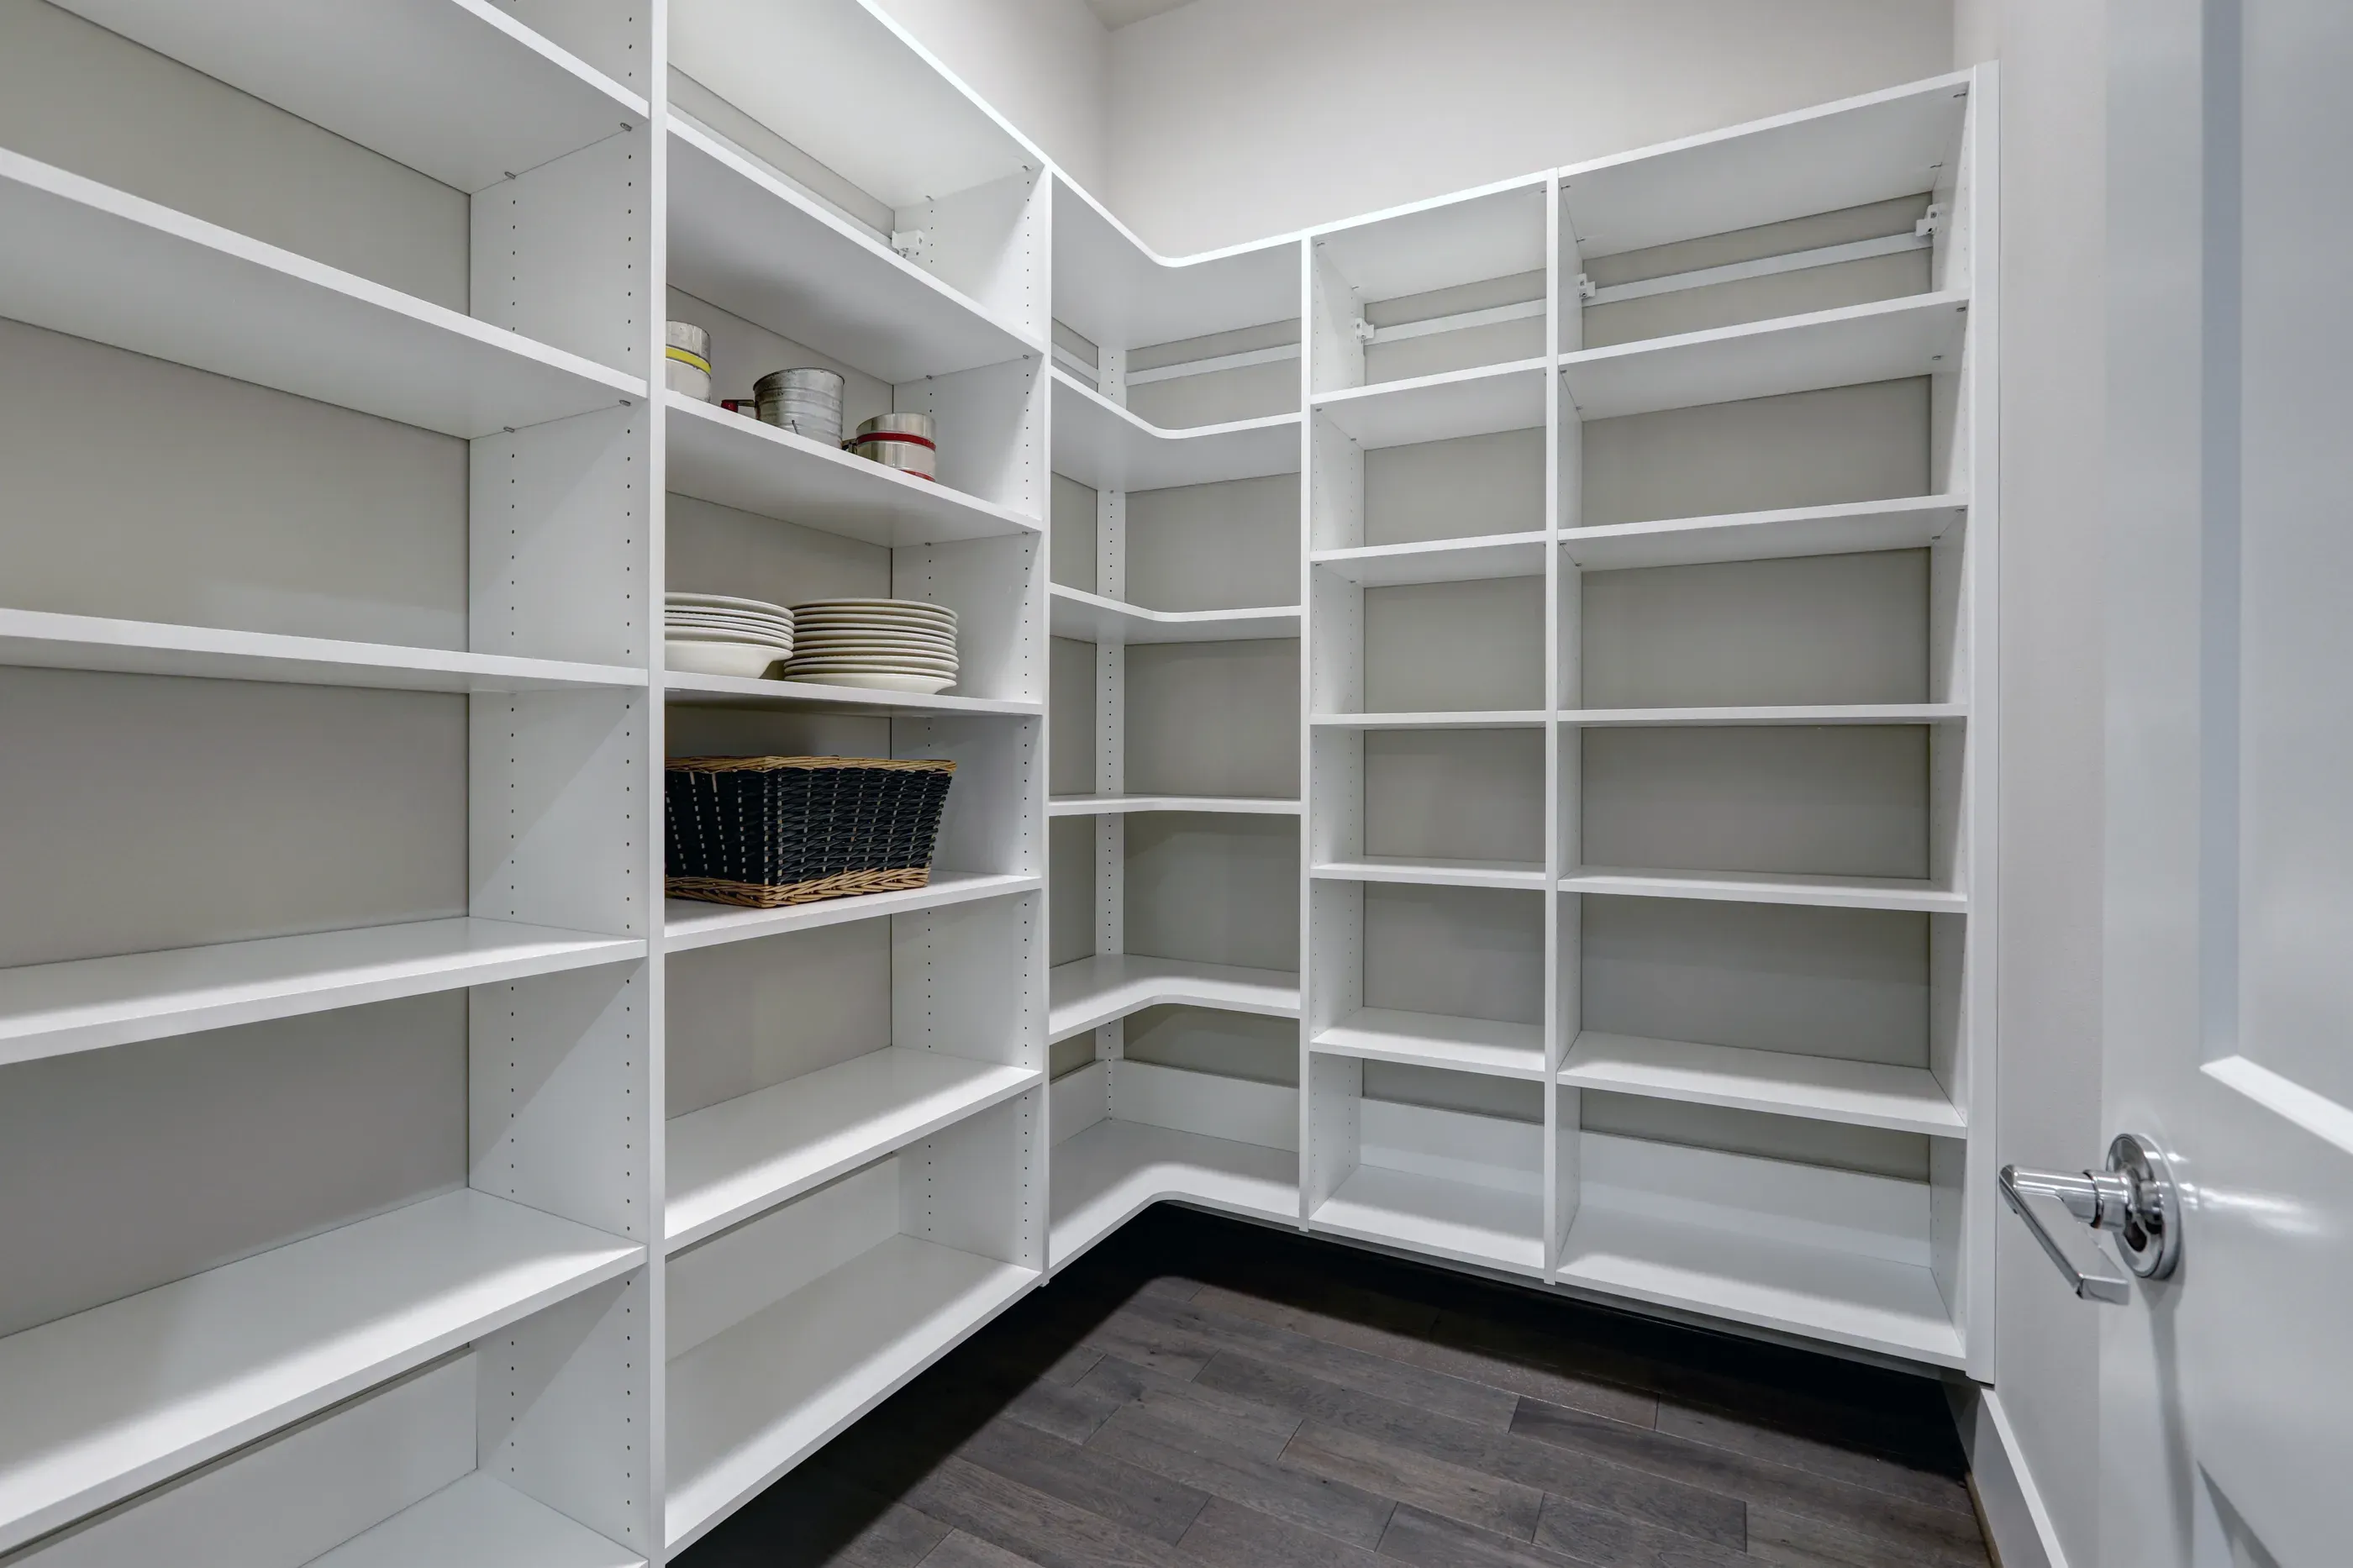
Avoid too-deep shelving.
This is the number one problem with old, inefficient pantries. Standards for shelf depth have them at 12” to 16 inches deep. However, many old remodels have shelves that exceed 20” in depth. Approximately 12” is your best bet for keeping everything tidy and reducing waste. That’s about three cans deep, and nothing gets lost in the back.
Add drawers and pull-outs.
Closed pantry storage can get messy fast, and eventually, you’ll stop digging around in that drawer. Custom pull-outs and tiered drawers with inserts achieve the opposite. They protect both the product and the tidiness of your pantry. These are among the best modern storage solutions if heavily used and small items are always getting knocked over on shelves.
Update the lighting.
Dark corners and dim shelves are a major barrier to locating and using what you have. You may not need the triple-layer lighting strategy a kitchen demands. Still, upgrade the overhead lighting and add task lighting to shelves or dark corners.
![]()
Vary the height of storage spaces.
Pantries of any size benefit from variation in shelf height as well as shorter depth. This is the design element that will have the biggest impact on the appearance and efficiency of a pantry. Lower shelves should be taller. Center shelves sit in the 12” range. Corners and edges can feature shelves with smaller dimensions, so those items don’t have half a foot of free space above them.
How to organize a walk-in pantry: Tips and remodel advice
The following pantry organization ideas and tips can save money, both short-term and long-term.
-
Don’t repackage everything. In 2026, we’re ditching flimsy, unnecessary containers that only serve an aesthetic purpose. If something is clearly labeled and decently packaged when you buy it, keep it that way.
-
Bundle your remodel. Match finishes and master work zones and pantry zones at once. You can save on the cost of labor and streamline the schedule by taking your pantry project and bundling it with your kitchen remodel.
-
Don’t forget door storage. Racks on the back of the pantry door are ideal for mops, brooms, grocery bags, pet leashes, and other items that clutter up pantries and create a distracting environment.
-
Plan only for the pantry you need. If you host frequently and the kitchen handles most of your food storage, try a butler’s pantry. This features more closed cabinet storage with amenities you don’t want to fit in the kitchen, like beverage fridges and a prep/bar sink.
Update your walk-in pantry with help from a professional kitchen designer.
Remodeling a pantry for style and efficiency? That’s The Designery’s whole mission. You get professional design strategies, tailor-made customizations, quality materials, and access to our trusted network of contractors under one roof. Save time, clear confusion, and start anew with a design team dedicated to improving your lifestyle.
“The communication was top-notch, and I was grateful to have someone to message every time we had a question on design, materials, timeline, budget, or issues. Questions were answered quickly (even on weekends). We’re so grateful for the work the Designery team put in to create our dream kitchen!”
Ariana, The Designery client
Visit your local showroom to begin planning your design.